

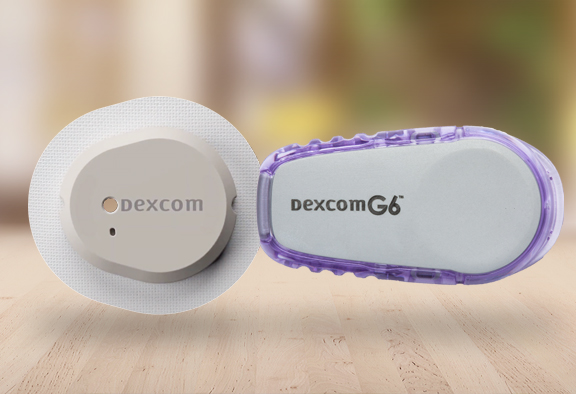
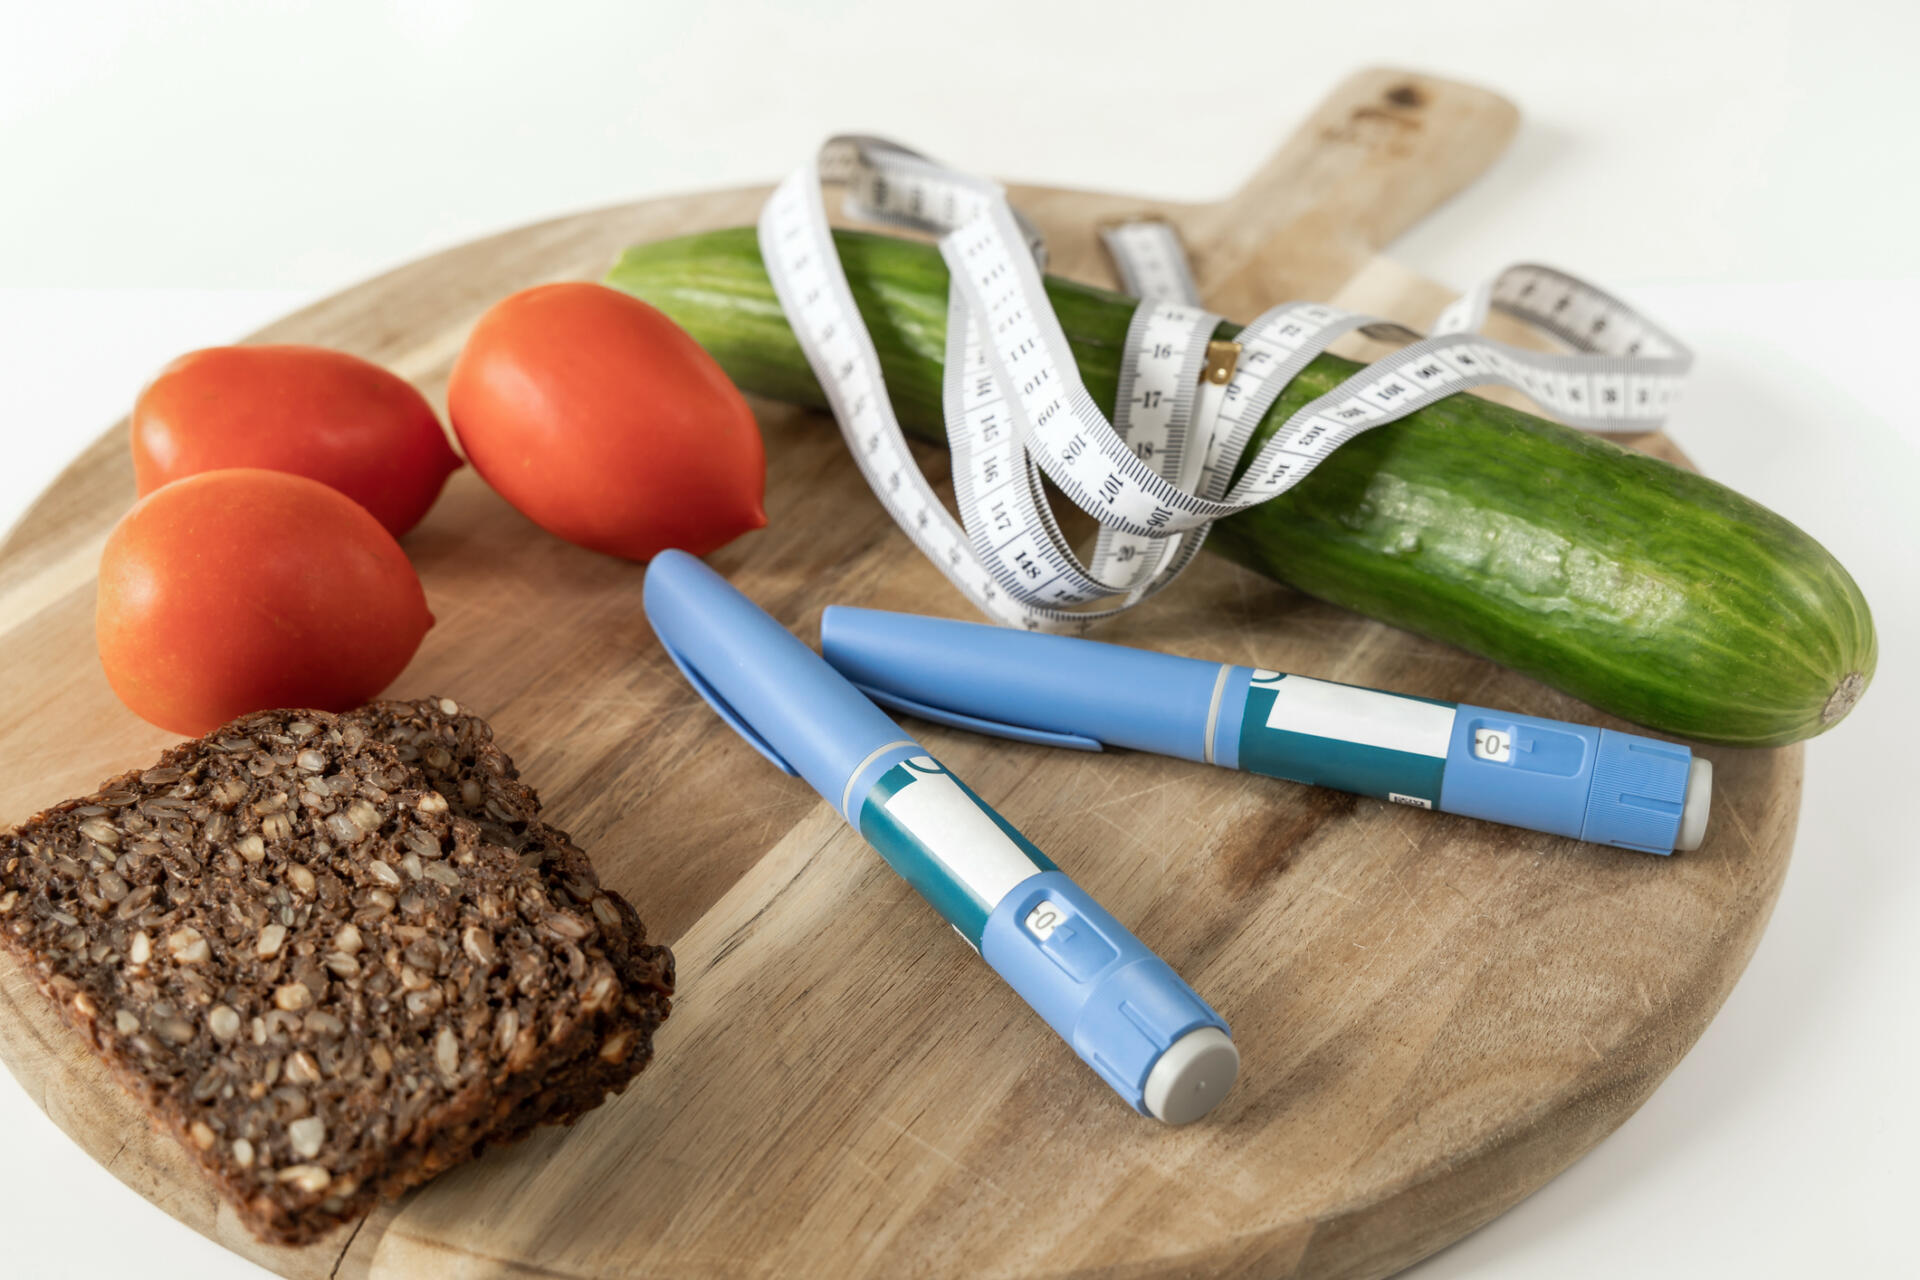
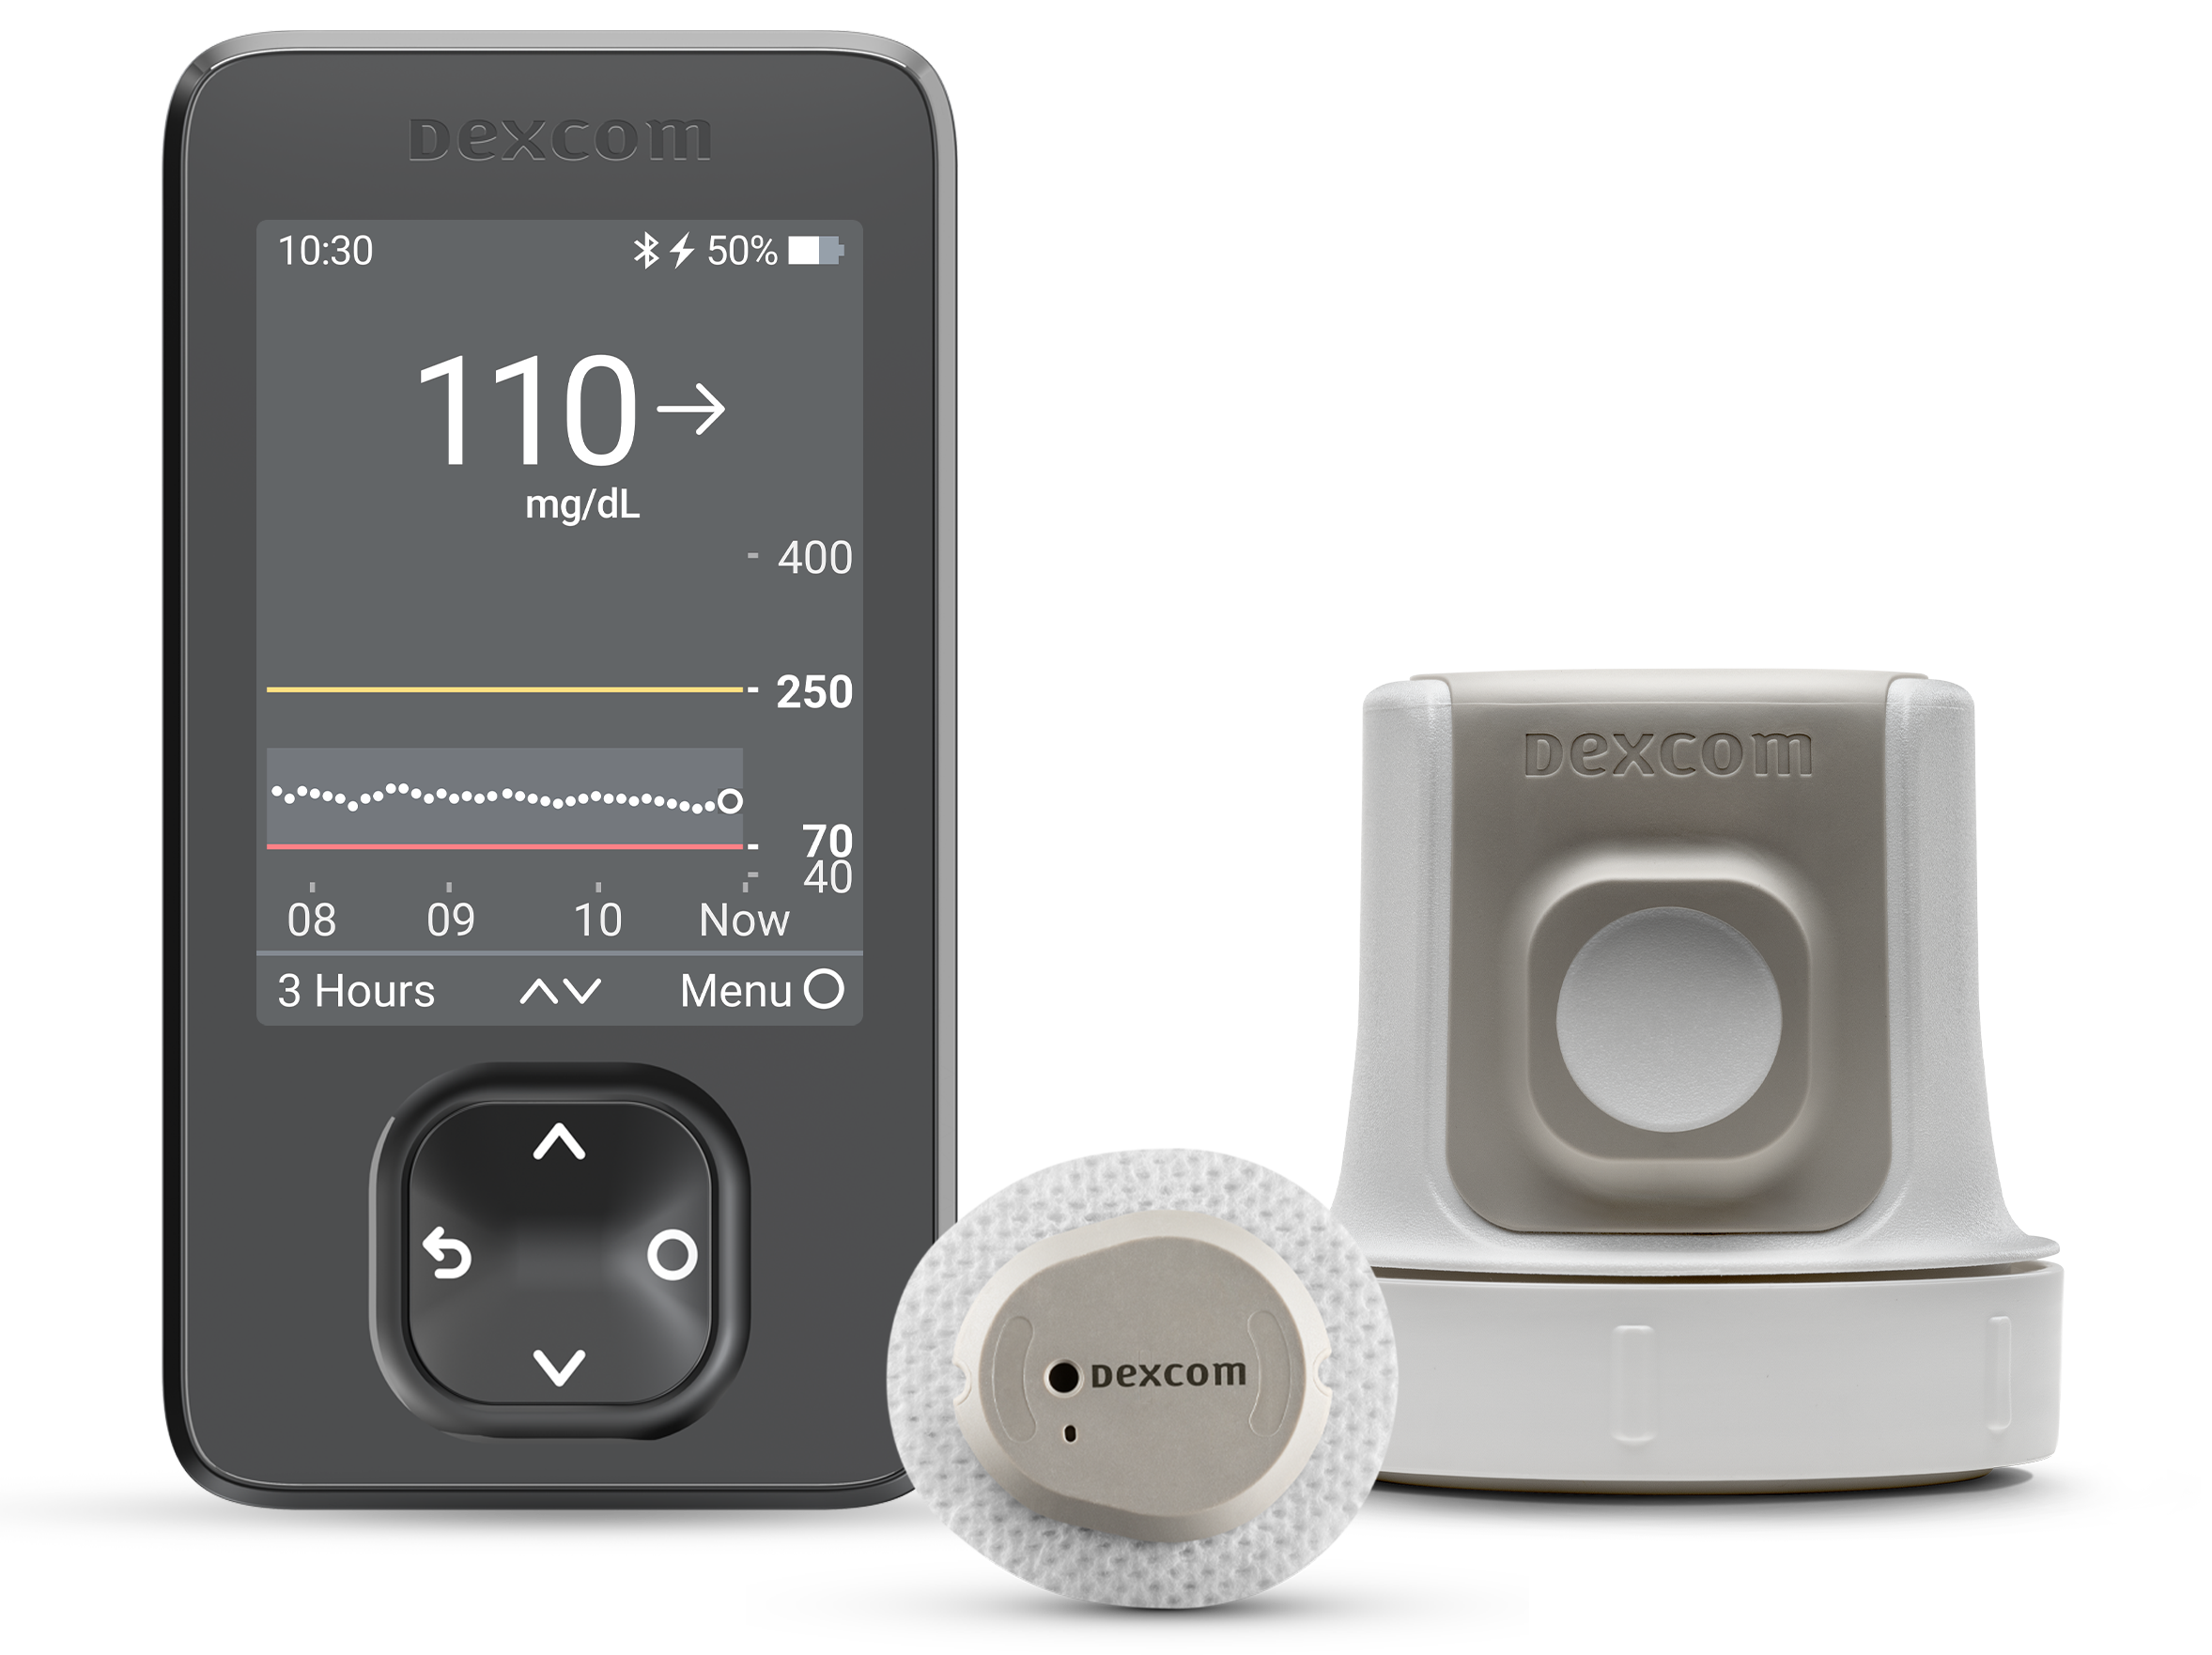
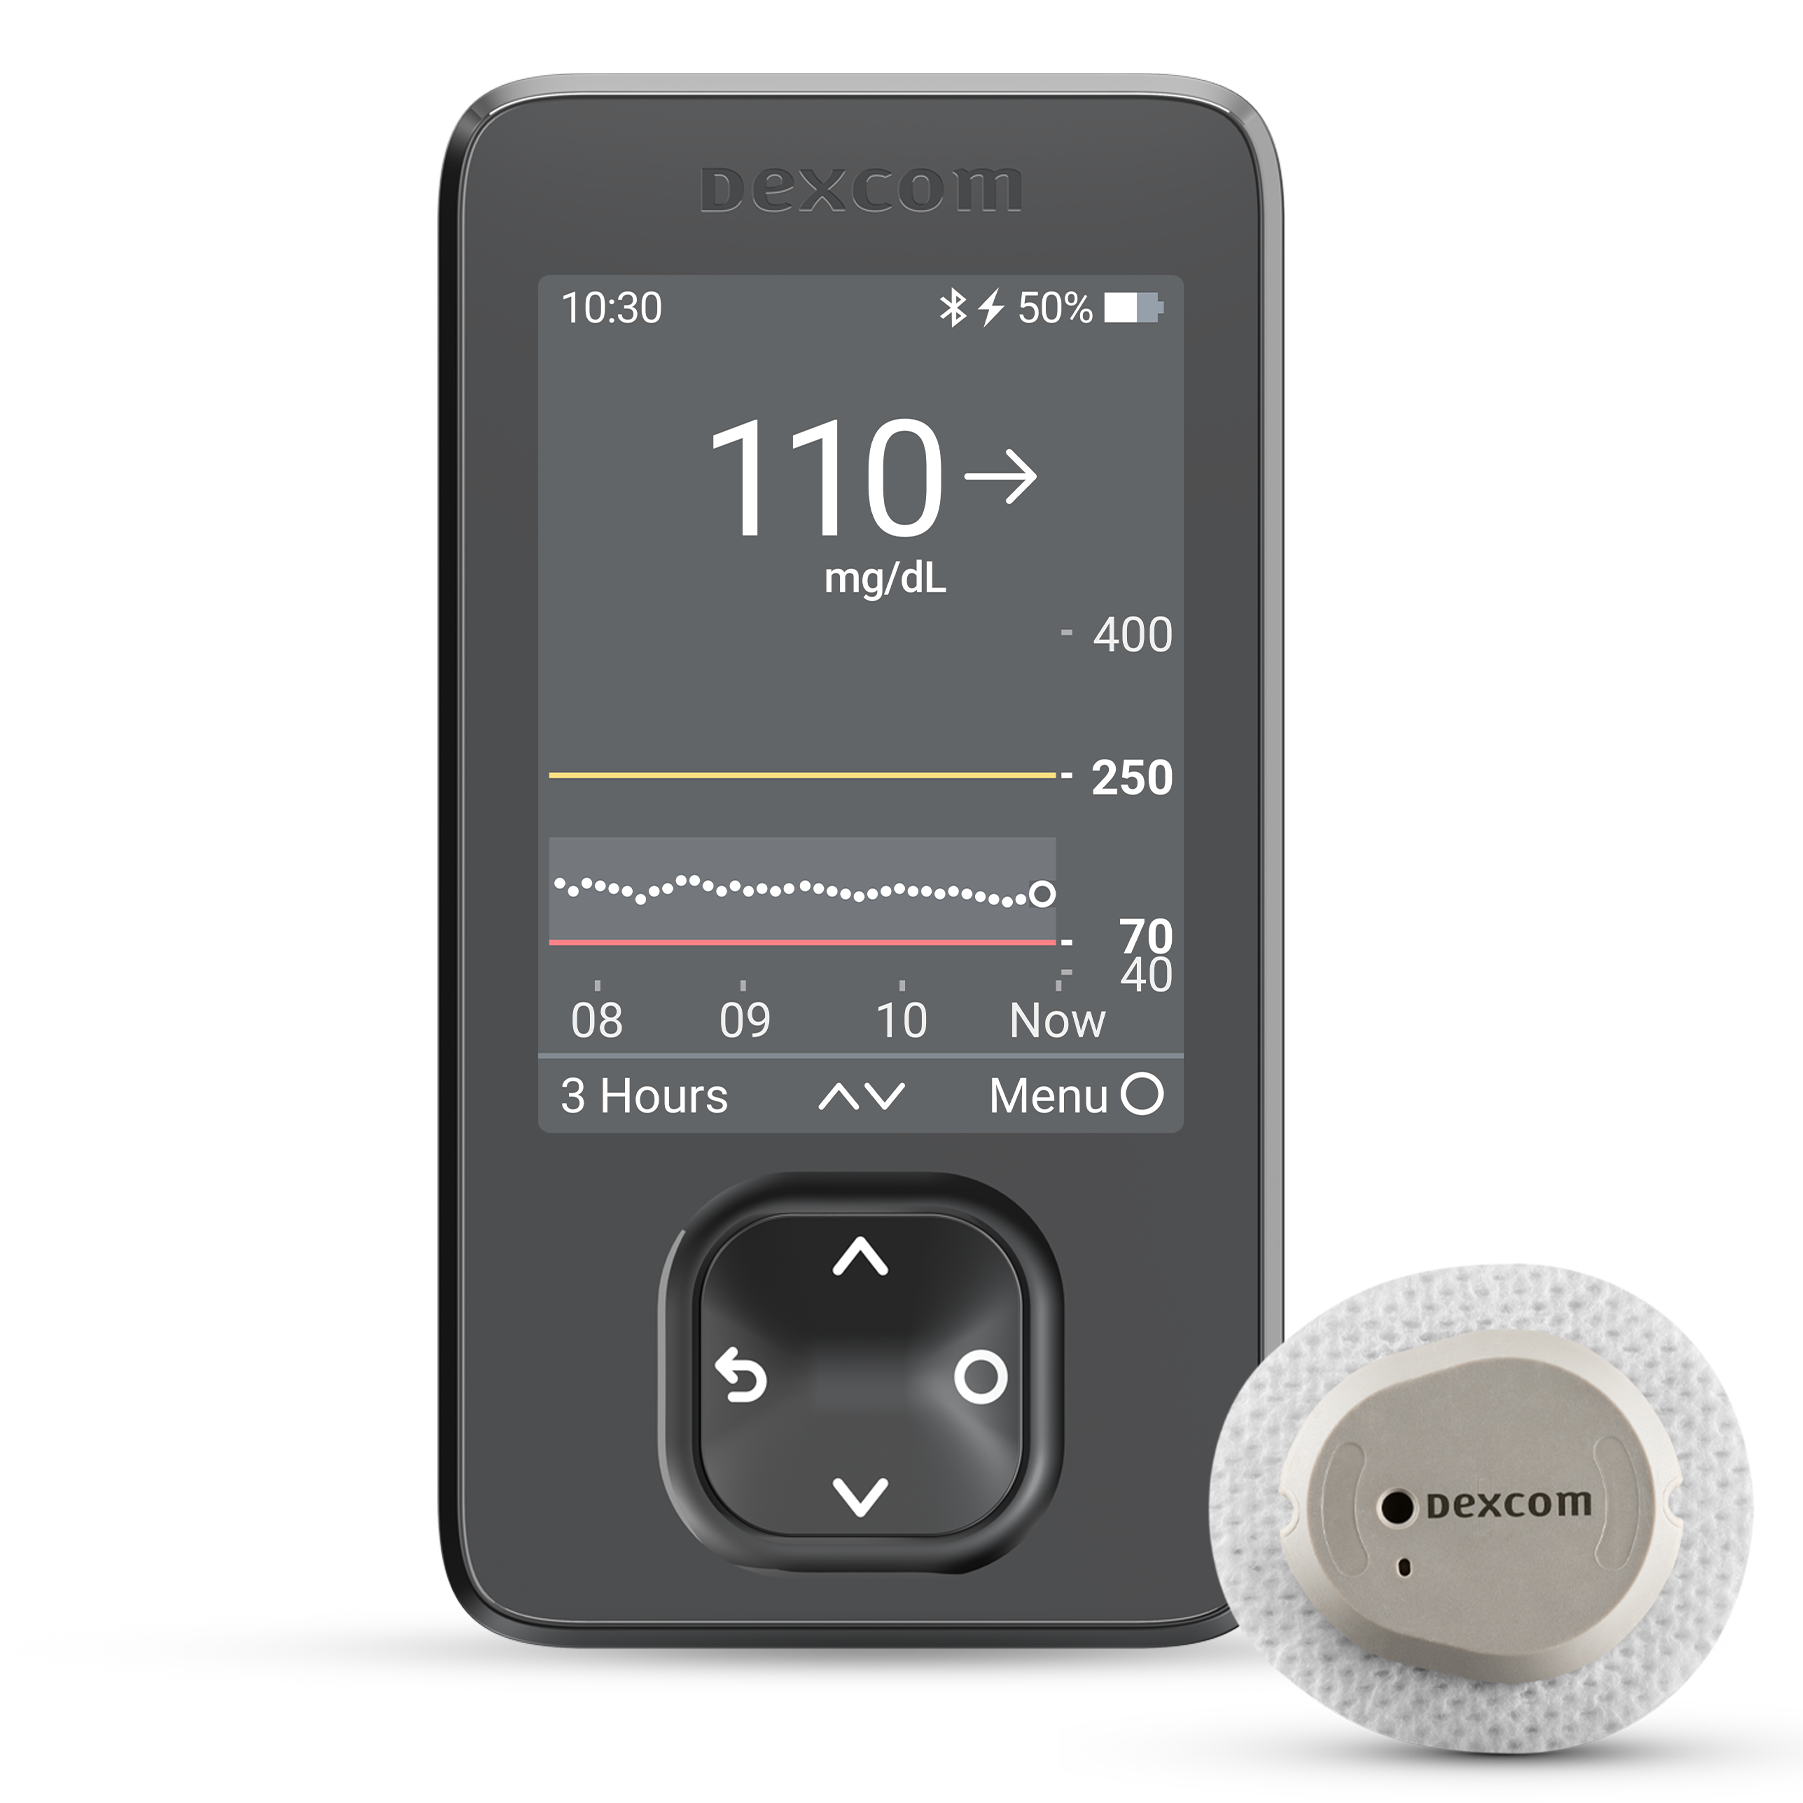
Dexcom G7 Sensor Kit - Box of 1
Description
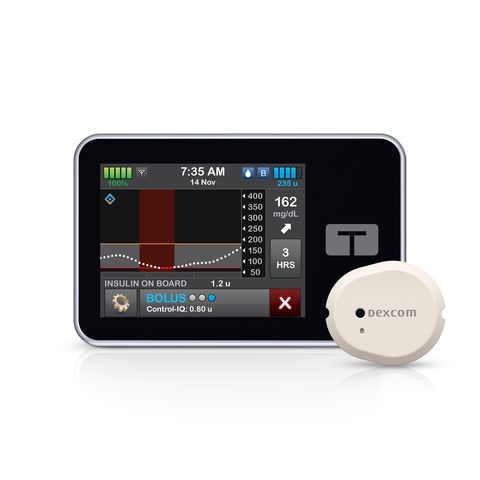
The Dexcom G7 CGM System is Dexcom’s most advanced continuous glucose monitoring system yet—now available in two wear options:
Dexcom G7 (10-day wear) – FDA-cleared for ages 2 and older
Dexcom G7 15 Day (15.5-day wear including 12-hour grace period) – FDA-cleared for adults 18+
Both sensors deliver real-time glucose readings every 5 minutes, require no fingersticks*, and are 60% smaller than previous models†. They warm up faster than any other CGM sensor†† and work with the Dexcom G7 app or receiver for easy monitoring.
Dexcom G7 Sensor Kits may be covered by your insurance or Medicare. To see if you qualify, fill out the form or call us at 877-840-8218.
Features
Shared Features (10-day & 15-day):
- One-push applicator for simple, comfortable sensor application
- Sends real-time results to your smart device††
- Works with the Dexcom G7 app and receiver
- Ideal for managing type 1, type 2, or gestational diabetes
- Waterproof§
Dexcom G7 (10-day):
- 10-day wear + 12-hour grace period
- Approved for ages 2+
Dexcom G7 15 Day:
- 15.5-day wear + 12-hour grace period†
- Slightly improved accuracy (MARD 8.0% vs 8.2%)¹
- Approved for adults 18+
Specifications
- Operational Temperature: 50–107.6°F
- Dimensions: 24 × 27.3 × 4.6 mm
- Power Source: Internal/battery power
- Battery Lifespan:
• Dexcom G7: 10 days (+12-hour grace period)
• Dexcom G7 15 Day: 15.5 days (+12-hour grace period)† - Battery Charging Time: Non-rechargeable
How to Apply the Dexcom G7 Sensor
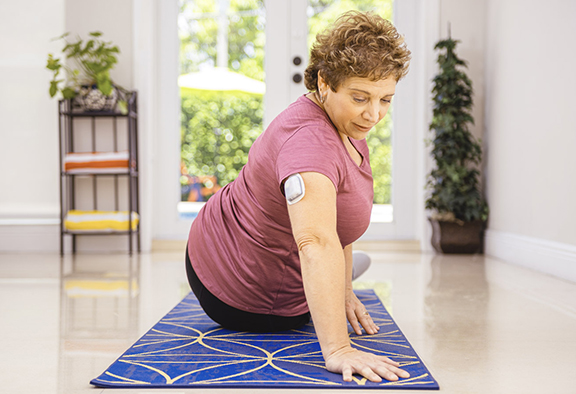
Step One: Choose a Sensor Site The area where you’ll wear your Dexcom G7 sensor can vary based on your age. If you are at least seven years old, you’ll wear this sensor on your abdomen or the back of your upper arms. Dexcom G7 users between 24 months and six years of age can wear sensors on either of those sites or on the upper buttocks.
Step Two: Clean and Dry the Site No matter what site you choose for your Dexcom G7 sensor, it needs to be clean. Wash your hands before rubbing the sensor site with an alcohol wipe, and wait until the area is dry before proceeding.
Step Three: Insert the Sensor When you’re ready to apply the sensor, unscrew the applicator cap. When that’s done, relax your muscles near the sensor site and press and hold the applicator against your skin before pushing the button.
Step Four: Remove the Applicator Once the sensor is applied, remove your applicator and screw its cap back on. Be careful not to throw away the applicator - you’ll need access to its pairing code.
Step Five: Keep Your Sensor in Place Secure your Dexcom G7 sensor by firmly rubbing three times around the patch and pressing down on the sensor for 10 seconds. If your sensor needs to be secured further, use the overpatch included in your sensor kit.
For a complete breakdown of the Dexcom G7 sensor application process, refer to Dexcom’s official sensor insertion guide.
Disclaimer
Fingersticks required for diabetes treatment decisions if symptoms or expectations do not match readings
† Compared to a prior generation Dexcom CGM System
†† Dexcom G7 can complete warmup within 30 minutes, whereas other CGM brands require up to an hour or longer
§ Dexcom G7 sensor is waterproof and may be submerged under eight feet of water for up to 24 hours without failure, when properly installed
¹ Dexcom, Data on File, 2025
FREQUENTLY ASKED QUESTIONS - DEXCOM G7 SENSOR

Medical Review by Shirley DeLeon, Certified Diabetes Care and Education Specialist
Related Articles

Different Types of CGM: A Complete Guide
What is the Best Continuous Glucose Monitor (CGM) for Your Diabetic Needs? It’s a fact of life – people with diabetes need to check their glucose levels every so often. In the past, that meant doing multiple finger-prick tests per day. But these tests are inconvenient and painful, so it’s not hard to see why…
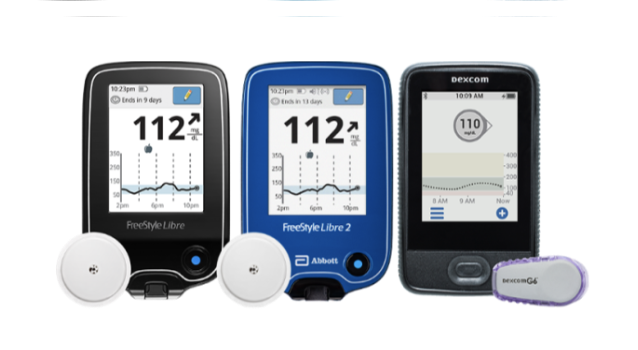
What are Continuous Glucose Monitoring Devices and How to Choose a CGM?
Choosing a Continuous Glucose Monitor is a big decision. Here we breakdown the top CGMs, their manufacturers, and features so you can select the right CGM to fit your lifestyle.

Just Diagnosed With Diabetes: A Guide
When you have newly diagnosed diabetes, knowing your next steps is crucial. Here are US MED’s tips for living with diabetes.

Is a CGM FSA Eligible?
Continuous Glucose Monitors (CGMs) are life-changing tools for many individuals living with diabetes. Their real-time insights empower people to effectively manage blood sugar levels and avoid dangerous highs and lows. While CGMs make diabetes management easier, navigating how to pay for them—especially when it comes to insurance and medical benefits, can be confusing. US MED…

Diabetes in Men: Taking Control of Stress
Managing high blood sugar is tedious for anyone, but how does stress impact diabetes in men? Certain factors like financial pressures, trouble sleeping, and sexual health can lead to blood sugar spikes and make it harder to get your glucose under control. The good news is that you’re not alone, and there are tools that…

Top Medicare Deductible Questions
If you’re on Medicare and have questions about your deductible, you’re not alone. Each year, Medicare beneficiaries face different deductibles depending on the type of coverage they have. Knowing when and how your deductible resets can help you budget for the year ahead and avoid unexpected expenses. At US MED®, we work daily with both…

Insulin Overdose: Signs, Treatment, and Prevention
If you’re asking yourself “can you overdose on insulin?,” you should know this is a real possibility. Here’s the US MED guide to handling an insulin overdose.
What is Postprandial Blood Sugar?
Keeping your postprandial blood sugar under control is an essential part of living with diabetes. Here, you’ll find US MED’s in-depth explanation of postprandial blood sugar, along with tips on how to control it.
Dexcom G6 vs G7: What to Know
Learn about the latest news on Dexcom G7, how it compares to the Dexcom G6, and how to get through US MED.

Does Medicare Cover Diabetes Supplies?
Are you wondering if Medicare will cover your purchase from US MED? Find out more about Medicare coverage and our wide selection of diabetes supplies.

Can You Trust Your Diabetic Supply Company? 3 Signs to Look For
You depend on your diabetic supply company to provide you with safe, quality supplies for managing diabetes. How do you know if your Durable Medical Equipment (DME) provider is legitimate? Are you receiving genuine name brand products or knockoffs? Read on to learn about 3 signs to look for when choosing the safest and most…

5 Steps for Managing Diabetes | Type 1 and Type 2
5 Steps for Managing Diabetes | Type 1 and Type 2 We’ll walk you through five steps to help you manage your diabetes so you can live a life you love. Written by: US MED Staff Clinically Reviewed by: Shirley DeLeon, RD, CDCES Managing diabetes isn’t always easy. The process of dealing with this condition comes with all sorts of inconvenient…

Prediabetes: Key Risk Factors and Effective Lifestyle Changes
Prediabetes: Key Risk Factors and Effective Lifestyle Changes If you’re at risk for type 2 diabetes, you may develop a condition known as “prediabetes” first. Here’s US MED’s guide to prediabetes management. Written by: US MED Staff Clinically Reviewed by: Shirley DeLeon, RD, CDCES Many people who get diagnosed with type 2 diabetes feel like this…

Comparing the Best Insulin Pumps: Features, Pros, and Cons for Managing Diabetes
What is the Best Insulin Pump for Your Diabetic Needs? Diabetes is a serious condition, and more people than ever are dealing with this disease today. According to the CDC, the number of adults with diabetes has doubled in the past two decades. Everyone with type 1 diabetes (and more than a few people with…
Insulin Pumps and CGMs: A Complete Guide for Diabetes Management
How much is a CGM? How is an insulin pump different than a CGM? Get answers to these question and more in this product breakdown.
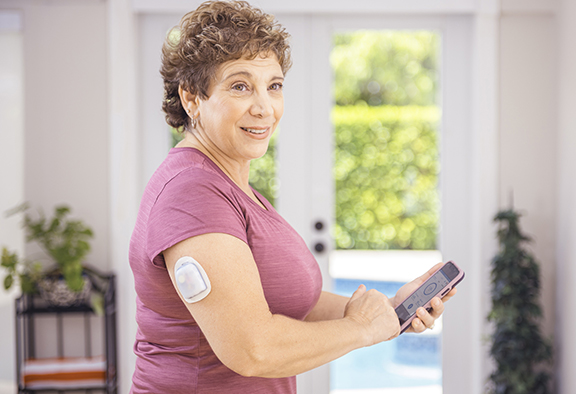
How to Apply a CGM Sensor
It’s no secret that continuous glucose monitors (CGMs) are popular among people with diabetes these days. If you’re wondering, “how is CGM inserted?,” keep reading for a complete guide to CGM installation and more.

Type 1 Diabetes vs Type 2 Diabetes
What is the Difference Between Type 1 Diabetes and Type 2 Diabetes? If you’ve recently been diagnosed with diabetes, you’re probably searching for clear answers about the differences between Type 1 diabetes and Type 2 diabetes. We know it can feel overwhelming, so we’re here to help distinguish between these two forms of the condition….

Do I Need a CGM Prescription? Answers for People with Diabetes
These days, most people with diabetes have at least heard of continuous glucose monitors (CGMs). These devices allow you to test your glucose levels by simply applying a sensor, significantly lowering your reliance on finger prick tests in the process. Are you wondering, “Do I need a CGM prescription?” If so, you’re in the right…

Managing Diabetes and Depression: Strategies for Your Mental Health
Both diabetes and depression can be difficult conditions to manage – and that’s especially true when you’re dealing with both at the same time. Get advice on how to cope from US MED.

Managing Diabetes When You’re Sick: Essential Tips
Many aspects of everyday life are more difficult when you’re managing diabetes, and that includes taking care of other illnesses. While colds and the flu can be inconvenient for anyone, having diabetes can increase your odds of getting seriously sick. Meanwhile, these conditions put extra stress on your body, potentially increasing your blood sugar levels…

Can Stress Raise Blood Sugar? | A Guide to Managing Stress and Diabetes
If you suspect stress may be affecting your ability to manage your diabetes, you’re not alone. Medical professionals have looked into possible connections between stress and diabetes since the 17th century. Today, scientific research indicates there may very well be a direct link between these two issues. Anyone who’s wondered “can stress and anxiety cause…

The Link Between Diabetes and Cardiovascular Disease: What You Need to Know
Maintaining optimal cardiovascular health is paramount for individuals navigating life with diabetes. It’s a reality that those managing diabetes face an increased likelihood of developing cardiovascular diseases (CVD), such as heart disease and stroke. In fact, CVD accounts for a significant portion of mortality among individuals with type 2 diabetes, comprising two-thirds of all deaths…

How to Care for Diabetes: A Guide for Families and Caregivers
Navigating the journey of diabetes care can be complex, but with the right knowledge and support, managing diabetes becomes more manageable. At US MED, we’re dedicated to empowering families and caregivers with essential insights on how to care for diabetes, especially for aging loved ones who face unique challenges with their condition. No matter who…
The Future of Diabetes Management: Why CGM and GLP-1s are a Symbiotic Pair
As a leader in the diabetes supplies industry, I have a front-row seat to the evolving landscape of care. One prominent discussion centers on the rise of GLP-1 semaglutide for type 2 diabetes. While some may see this as a threat to continuous glucose monitoring (CGM) technology, I believe the opposite is true: GLP-1s and CGM…

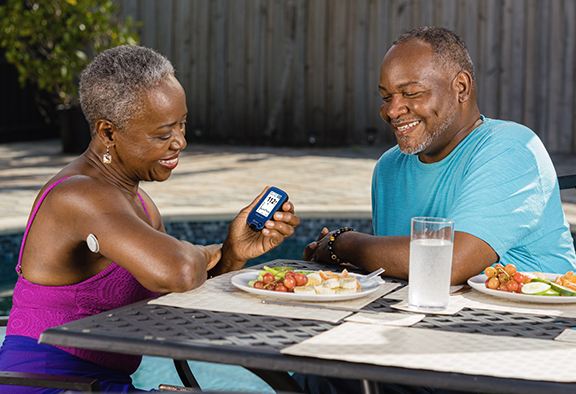
Best Blood Glucose Meters for 2024 | A Curated Guide
For people with diabetes, blood glucose meters aren’t just helpful—these devices are an essential component of any worthwhile diabetes management strategy. Still, some glucometers are better than others, so we’re here to shine a light on the best glucose meters on the market. And since you’ll be using your meter so often, it’s wise to…
Dexcom G7 Compatibility with Tandem t:slim X2: What You Need to Know | US MED
In early 2023, Dexcom began offering the Dexcom G7 Continuous Glucose Monitoring (CGM) System to U.S. residents with diabetes. This system launched with features like unmatched accuracy*, a discreet and comfortable sensor†, and a warm-up time twice as fast as any other CGM‡. But when this device launched, it was missing one capability its predecessor…

Diabetes and Dental Health: How to Protect Your Smile and Prevent Complications
Diabetes and Dental Health: How to Protect Your Smile and Prevent Complications Diabetes management can undoubtedly be stressful, but it’s best to face each day with a smile—though you’ll want to take a few steps to protect your smile first. In addition to diabetes complications such as heart problems and nerve damage, studies suggest a…

The Role of Technology in Diabetes Management: From Apps to Continuous Glucose Monitors
Since its discovery in 1921, insulin has played a central role in treating type 1 (and, in some cases, type 2) diabetes. But while this was undoubtedly a milestone in the history of diabetes management, technological progress hasn’t stopped there. Much more recent developments have also led to notable improvements in the lives of people…

Diabetes and Family Support: Navigating the Impact and Outcome Together
Living with diabetes presents its challenges, and as a family member or caretaker, your support is crucial. Diabetes requires constant management and doesn’t just disappear over time. With approximately 28.7 million diagnosed cases in the US alone, it’s clear that many families are affected by this condition. Your loved one needs a strong support system…

Intermittent Fasting and Diabetes: Potential Benefits and Consideration
In this article we take a closer look at Intermittent Fasting and share with you the risks and benefits.

Having a Social Life and Navigating Events with Diabetes
Managing diabetes can be difficult enough as it is. This is US MED’s guide on how to balance diabetes management and still have a fun time.

Is There a Link Between Diabetes and Stress?
Are you interested in improving your diabetes management strategy by taking steps to deal with the physical and mental side effects of stress? If so, keep reading for a comprehensive overview of the link between diabetes and stress.
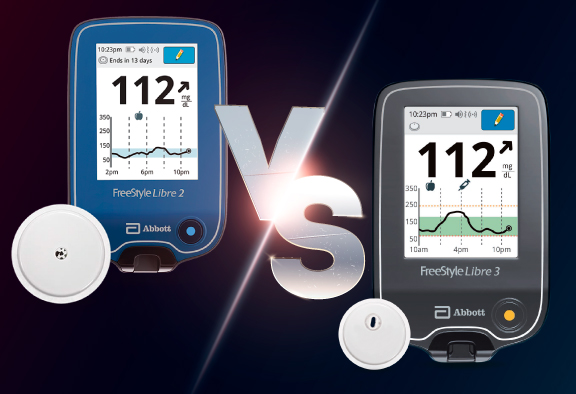
Main Differences Between the Freestyle Libre 3 vs 2
Learn the key distinctions between Abbott’s latest continuous glucose monitoring systems in this guide with US MED.
What Is a Closed-Loop System?
Learn all about closed-loop diabetes management solutions, combining the use of a CGM and insulin pump, in this guide from US MED.

Traveling with Diabetes: Tips for a Smooth Journey and Blood Sugar Control
Planning a trip is stressful, but managing your diabetes makes it even more challenging. US MED has all the tips you need, so you can get into vacation mode.

Going Back to School with Diabetes
Back-to-school season can be stressful for any parent, and there’s even more to worry about if your child has diabetes. This comprehensive guide from US MED can help make sure your prepared.

What is Diabetic Neuropathy?
Find out more about Diabetic Neuropathy, including the causes, symptoms, and ways to avoid and treat this well-known diabetes complication.

Shoes, Diabetes, and Foot Health
Foot problems are common in people with diabetes, and wearing the right shoes is a great way to keep your feet safe. Learn more with US MED.

10 Natural Ways to Combat Diabetes
With diabetes cases increasing in America, it’s more important than ever to take action. If you need to know how to fight diabetes naturally, these ten tips from US MED can help.

Mushrooms and Diabetes: How Can Mushrooms Help with Blood Sugar Levels?
Learn more with US MED’s guide to adding mushrooms to your diabetes diet and discover how this food can help keep your blood sugar in check.

Diabetes Support Groups: Why Are They Important?
If you’re curious about diabetes support groups but don’t know how to get started, US MED can help. Here, you’ll find our comprehensive overview.

Staying Active with Diabetes: How Yoga for Diabetes Can Help
Following a yoga regimen could help you deal with the stress related to diabetes management. If you have type 2/type 1 diabetes and yoga sounds like something you might enjoy, keep reading for the information you need on starting a yoga routine.

How Does Diabetes Affect Sleep?
Are you wondering “how does diabetes affect your sleep?”. This is US MED’s overview of how sleep and diabetes type 2/type 1 intersect.
Being a Parent with Diabetes
When you know how to deal with diabetes, you’ll find it easier than ever to live with diabetes and raise your kids along the way. Here, you’ll find US MED’s advice for parents with diabetes.

Pre-existing Diabetes and Pregnancy
Have you been looking for information on pregnancy and diabetes? If so, there’s a good chance you’re already familiar with gestational diabetes—that is, diabetes initially diagnosed mid-pregnancy. However, that doesn’t mean there’s no connection between other forms of diabetes and pregnancy. As recently as the mid-20th century, women who had type 1 diabetes were discouraged…
Dexcom G7 Release Date, Features & Cost Insights
Are you interested in learning more about the Dexcom G7 and what distinguishes it from other CGMs available today? If so, you’re in luck. Take a look at our complete overview of this exciting new product!
Dexom G7 CGM Super Bowl Ad with Nick Jonas
The long-awaited Dexcom G7 CGM is here. With the help of Nick Jonas, Dexcom is introducing the new Dexcom G7 CGM in a 2023 Super Bowl commercial.

Know Your Diabetes ABCs | US MED
Learning essential diabetes management steps can make managing this disease far simpler. Learn the ABCs of diabetes with US MED.
Does Diabetes Cause High Blood Pressure?: Understanding Between High Blood Pressure and Diabetes
If you’re wondering, “can diabetes cause high blood pressure?” or “how can I control high blood pressure with diabetes?,” read on for all the answers you need.
Diabetes Sweating Connection: Why Does Diabetes Make You Sweat?
Diabetes may cause you to sweat more than usual. Learn more on how diabetes and sweating are connected in the article below.

Currently a
US Med® Member?
If you're an existing member, the fastest and easiest way to reorder is by logging into the members portal, where you can also update your account.

Interested in Becoming a US MED® Member?
It's simple, fast and easy! Just complete a quick form or call 1-877-840-8218 now and let us take care of the rest.

Prefer to reorder by phone?
No problem! Just call 866-723-6958 and our agents will walk you through the reorder process.
AHCA Licensure Numbers: 1313231 and 1314211
For Healthcare Professionals
Our Products
Insulin
Insulin Pen Needles & Syringes
US MED® is America's primary choice for home delivery of quality medical supplies. Since 1996, over 1 million satisfied members have received disease state education and medical supplies from our highly trained customer service specialists. US MED®, the largest provider of Diabetic Supplies to the Medicare community, is licensed and accredited by Accreditation Commission for Health Care (ACHC) and maintains an A+ rating from the Better Business Bureau. We provide all products necessary to treat the Diabetes disease state, including therapies for its associated comorbidities. Our product portfolio includes, but is not limited to, the following: Diabetic testing strips, Continuous Glucose Monitors or CGMs, Insulin Pumps, Sleep Apnea and CPAP supplies, and Nebulizers.