

Dexcom G6 Sensor and Applicator may be covered by your insurance/Medicare. To see if you qualify, fill out the form or call us at 877-840-8218.

Dexcom G6 Sensors & Applicator
Description
Get a 90-day supply of your Dexcom G6 sensors from US MED.
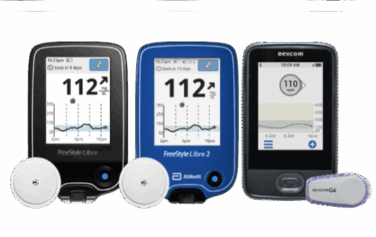
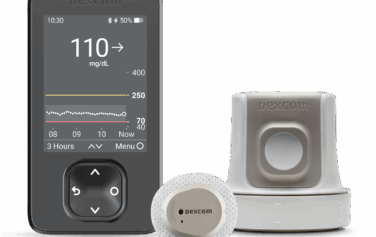
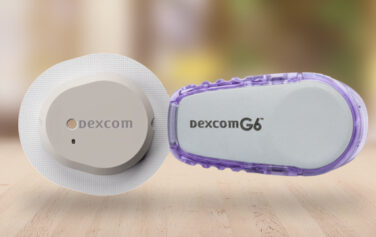
The G6 sensor, transmitter and receiver combine to form your Dexcom G6 CGM system. The sensor measures your glucose levels and is easily inserted just beneath the skin, with a push of a button. G6 sensors are typically sold as a 3-pack, which equates to a one-month supply.* A 3-pack of Dexcom G6 Sensors includes three sensors and three applicators. Sensors are meant to be used for up to 10 days. US MED provides a 90-day supply of Dexcom sensors to reduce the number of times you need to reorder.
Note: A prescription is required for Dexcom G6 Sensors
Features
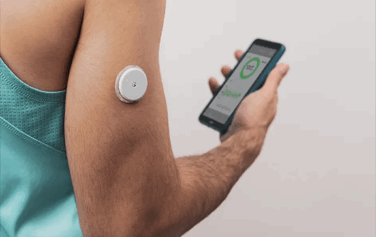
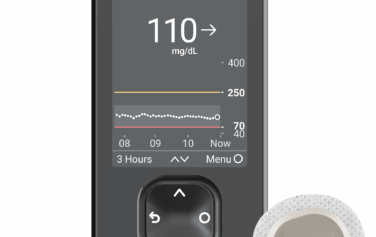
- Sends real-time results to your Dexcom Receiver or smart device†
- One-push applicator allows for simple and comfortable application of sensor
- Can be worn by people with diabetes ages two and up
- Ideal for managing type 1 or type 2 diabetes
- Works with the Dexcom G6 App
- 2-hour warm up period
- Water resistant to 8 feet for up to 24 hours
Check compatibility with your smartphone
Dexcom G6 Replacement Sensors
If you have a faulty Dexcom sensor and need a replacement, please contact Dexcom by using the following form.
Sensor Storage Specifications
- Useful Life: Up to 10 days
- Storage and Transport Conditions: Temperature: 36°F -86°F | Store sensors in a cool dry place.
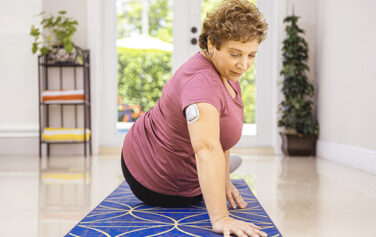
Sensor Placement
Dexcom recommends the following 2 areas for placement of your G6 sensors:
- Abdomen placement is recommended for ages 2 years old and older.
- Placing the sensor in the upper buttocks area is only recommended for children ages 2 -17 years old.
How to Apply the Dexcom G6 Sensor
Step One: Choose a Sensor Site
Select one of the two sites listed above. Things to consider:
- The abdomen is an easy area to cover up with clothing, making it a great area if you want to be discreet
- Choose a site at least 3 inches away from your insulin pump infusion set or injection site
- Avoid bony areas (like ribs and hip bones) and areas with scarring, tattoos, or hair
- Do not use the same sensor site twice in a row (It’s best to alternate sites with each new sensor)
Step Two: Clean and Dry the Site
It’s important to properly clean the site prior to inserting your G6 replacement sensor. Wash/dry your hands before rubbing the sensor site with an alcohol wipe, and wait until the area is dry before proceeding.
Step Three: Insert the Sensor
Remove both protective labels that cover the sensor applicator. (Do not touch the adhesive on the sensor) Place and hold the applicator on your skin, then fold and break off the safety guard. Press the button to insert the sensor then remove the applicator.
Congratulations! You have successfully inserted your sensor. Now it’s time to attach your Dexcom G6 transmitter.
You May Also Like
These sensors are designed for use with the Dexcom G6 CGM System, which you can also buy through US MED.
*Dexcom recommends against reusing a sensor after the initial 10-day period is over.
†Compatible smart devices sold separately. For a list of compatible devices, visit dexcom.com/compatibility
Related Articles

Diabetes, Diet & Fitness, Uncategorized
5 Steps for Managing Diabetes | Type 1 and Type 2

Blog, Diabetes, Information
Prediabetes: Key Risk Factors and Effective Lifestyle Changes

Diabetes, Products, Technology
Comparing the Best Insulin Pumps: Features, Pros, and Cons for Managing Diabetes
Blog, Diabetes, Technology
Insulin Pumps and CGMs: A Complete Guide for Diabetes Management
Blog, Diabetes, Information, Products, Technology
How to Apply a CGM Sensor

Blog, Diabetes, Uncategorized
Type 1 Diabetes vs Type 2 Diabetes

Diabetes, Products, Technology
Do I Need a CGM Prescription? Answers for People with Diabetes

Blog, Diabetes, Information, Research
Managing Diabetes and Depression: Strategies for Your Mental Health

Diabetes, Information
Managing Diabetes When You’re Sick: Essential Tips

Diabetes, Information, Research, Uncategorized
Can Stress Raise Blood Sugar? | A Guide to Managing Stress and Diabetes

Diabetes, Diet & Fitness, Information, Research
The Link Between Diabetes and Cardiovascular Disease: What You Need to Know

Blog, Diabetes, Information
How to Care for Diabetes: A Guide for Families and Caregivers
Diabetes, Information, Products, Research, Technology, Uncategorized
The Future of Diabetes Management: Why CGM and GLP-1s are a Symbiotic Pair
Diabetes, Information, Products, Technology
Best Blood Glucose Meters for 2024 | A Curated Guide

Diabetes, Products, Technology, Uncategorized
Different Types of CGM: A Complete Guide

Diabetes, Products, Technology
Dexcom G7 Compatibility with Tandem t:slim X2: What You Need to Know | US MED

Blog, Diabetes, Nutrition
Diabetes and Dental Health: How to Protect Your Smile and Prevent Complications
Diabetes, Products, Research
The Role of Technology in Diabetes Management: From Apps to Continuous Glucose Monitors

Blog, Diabetes
Diabetes and Family Support: Navigating the Impact and Outcome Together

Blog, Diabetes, Diet & Fitness, Nutrition
Intermittent Fasting and Diabetes: Potential Benefits and Consideration

Blog, Diabetes, Information
Having a Social Life and Navigating Events with Diabetes

Blog, Diabetes, Diet & Fitness
Is There a Link Between Diabetes and Stress?
Blog, Products
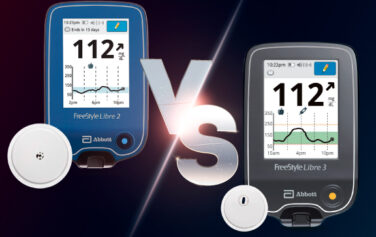
Main Differences Between the Freestyle Libre 3 vs 2

Blog, Diabetes, Products
What Is a Closed-Loop System?

Blog, Diabetes, Holidays, Information
Traveling with Diabetes: Tips for a Smooth Journey and Blood Sugar Control

Blog, Diabetes, Information
Going Back to School with Diabetes

Blog, Diabetes, Information
What is Diabetic Neuropathy?

Blog, Diabetes, Information, Research
Shoes, Diabetes, and Foot Health

Blog, Diabetes
10 Natural Ways to Combat Diabetes

Blog, Diabetes, Diet & Fitness, Information, Nutrition, Research
Mushrooms and Diabetes: How Can Mushrooms Help with Blood Sugar Levels?

Blog, Products
Medicare Benefits: Does Medicare Cover Diabetes Supplies | US MED

Blog, Diabetes, Information
Tips for People Newly Diagnosed with Diabetes

Blog, Diabetes, Information
Diabetes Support Groups: Why Are They Important?

Blog, Diabetes, Diet & Fitness, Exercise
Staying Active with Diabetes: How Yoga for Diabetes Can Help

Blog, Diabetes, Information, Research
How Does Diabetes Affect Sleep?
Blog, Diabetes, Information
Being a Parent with Diabetes

Blog, Diabetes, Information, Research
How to Handle an Insulin Overdose

Blog, Diabetes, Nutrition
Pre-existing Diabetes and Pregnancy
Blog, Diabetes, Information, Products, Research, Technology
Dexcom G7 Release Date, Features & Cost Insights
Blog, Diabetes, Products, Technology
Dexom G7 CGM Super Bowl Ad with Nick Jonas

Blog, Diabetes, Information, Products, Research
Know Your Diabetes ABCs | US MED
Blog, Information, Products, Technology
Dexcom G6 vs. Dexcom G7: What You Need to Know
Blog, Diabetes, Information, Research
Does Diabetes Cause High Blood Pressure?: Understanding Between High Blood Pressure and Diabetes
Blog, Diabetes, Information
Diabetes Sweating Connection: Why Does Diabetes Make You Sweat?
Blog, Diabetes, Information
Gestational Diabetes : What Should You Eat When You’re on a Healthy Meal Plan?
Blog, Diabetes, Nutrition
Postprandial Blood Sugar: How Long After Eating Does it Take for Blood Sugar to Return to Normal?
Blog, Diabetes, Information, Research
A1C Overview: What is A1C? | US MED
Blog, Diabetes, Information, Research
Diabetes Symptoms: What You Need to Know
Blog, Diabetes, Information, Research
Diabetes Rash: Appearance & Prevention
Blog, Diabetes, Information
Hypoglycemia Symptoms, Causes and Treatments for Diabetics

Currently a
US Med® Member?
If you're an existing member, the fastest and easiest way to reorder is by logging into the members portal, where you can also update your account.

Interested in Becoming a US MED® Member?
It's simple, fast and easy! Just complete a quick form or call 1-877-840-8218 now and let us take care of the rest.

Prefer to reorder by phone?
No problem! Just call 866-723-6958 and our agents will walk you through the reorder process.
Customer Reviews
AHCA Licensure Numbers: 1313231 and 1314211
For Healthcare Professionals
US MED® is America's primary choice for home delivery of quality medical supplies. Since 1996, over 1 million satisfied members have received disease state education and medical supplies from our highly trained customer service specialists. US MED®, the largest provider of Diabetic Supplies to the Medicare community, is licensed and accredited by Accreditation Commission for Health Care (ACHC) and maintains an A+ rating from the Better Business Bureau. We provide all products necessary to treat the Diabetes disease state, including therapies for its associated comorbidities. Our product portfolio includes, but is not limited to, the following: Diabetic testing strips, Continuous Glucose Monitors or CGMs, Insulin Pumps, Sleep Apnea and CPAP supplies, and Nebulizers.